back to blog

Common Flooring Mistakes and How to Avoid Them
Avoiding Common Flooring Mistakes: Essential Tips and Tricks for Home Renovation
When embarking on a home renovation journey, flooring often stands as a cornerstone for transforming a space, yet it’s an area where many homeowners stumble. From selecting the right materials to mastering installation techniques, avoiding common flooring mistakes is crucial for both aesthetics and durability. Whether you’re a seasoned renovator or a DIY enthusiast, understanding these potential pitfalls can save time, money, and frustration. In this comprehensive guide, we’ll delve into essential tips and tricks to ensure your flooring project enhances your home with lasting beauty and functionality. Join us as we uncover the secrets to successful DIY flooring and elevate your renovation game.
Understanding Common Flooring Mistakes
Before diving into your home renovation project, it’s crucial to understand the pitfalls that many homeowners face. By recognizing these common flooring mistakes, you can save time, money, and frustration in your DIY journey.
Choosing the Wrong Material
Selecting the right flooring material is paramount to the success of your renovation. Many homeowners make the mistake of choosing based solely on aesthetics, overlooking crucial factors like durability, maintenance, and suitability for specific rooms.
Consider the room’s purpose and traffic level. For high-traffic areas like entryways, opt for durable materials such as porcelain tiles or luxury vinyl. In bedrooms, softer options like carpet or engineered hardwood might be more appropriate.
Climate plays a significant role too. In humid areas, avoid solid hardwood, which can warp. Instead, consider moisture-resistant options like vinyl or tile.
Don’t forget about maintenance requirements. While natural stone looks luxurious, it often requires regular sealing. If you prefer low-maintenance flooring, consider options like laminate or luxury vinyl plank.
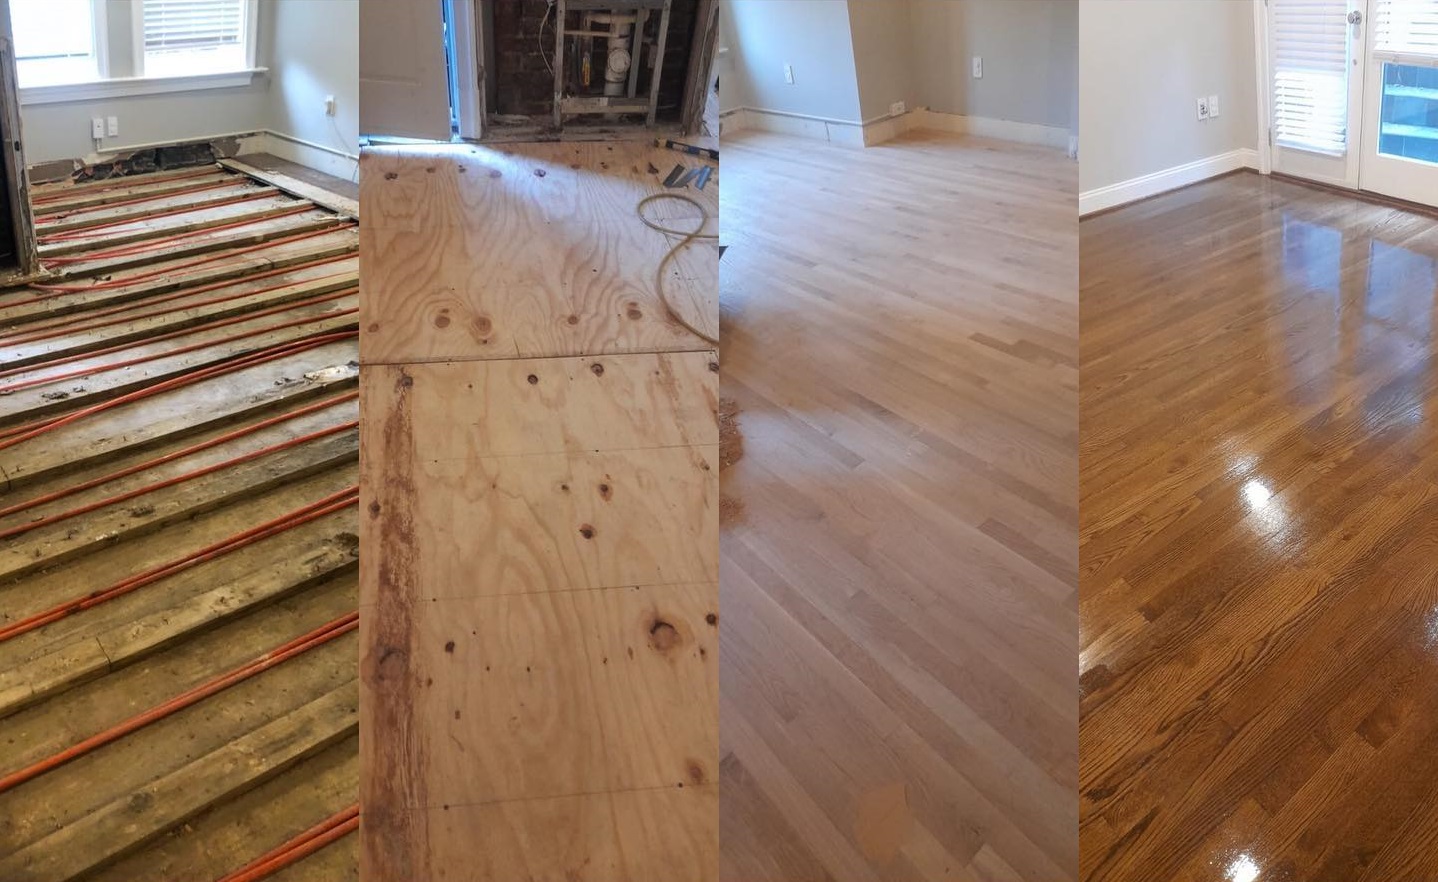
Ignoring Subfloor Preparation
A common flooring mistake that can lead to disastrous results is neglecting proper subfloor preparation. The subfloor is the foundation of your new flooring, and skipping this crucial step can result in uneven surfaces, squeaky floors, or even premature wear and tear.
Start by thoroughly inspecting your subfloor for any damage, such as rot, mold, or unevenness. Address these issues before proceeding with installation. This might involve replacing damaged sections or using a self-leveling compound to create a smooth surface.
Ensure the subfloor is clean and dry. Any debris or moisture can interfere with adhesion and lead to future problems. For some flooring types, like hardwood, you may need to install a moisture barrier to protect against potential water damage.
Don’t rush this step. Proper subfloor preparation can significantly extend the life of your new flooring and improve its overall appearance and performance.
Neglecting Moisture Control
Moisture is one of the biggest enemies of flooring, yet it’s often overlooked in the renovation process. Failing to address moisture issues can lead to warping, cupping, or even mold growth in your new floors.
Before installation, test the moisture content of both the subfloor and the new flooring material. Use a moisture meter to ensure levels are within the manufacturer’s recommended range. If levels are too high, delay installation and address the source of moisture.
In bathrooms, kitchens, and basements, consider installing a vapor barrier. This extra layer of protection can prevent moisture from seeping up through the subfloor and damaging your new flooring.
Remember that some flooring materials, like solid hardwood, are more susceptible to moisture damage than others. In areas prone to high humidity or potential water exposure, opt for moisture-resistant options like vinyl or tile.
Essential Tips and Tricks for Installation
Now that we’ve covered common mistakes, let’s explore some key tips and tricks to ensure a successful flooring installation. These insights will help you navigate the process with confidence and achieve professional-looking results.
Measuring Twice, Cutting Once
The old carpenter’s adage “measure twice, cut once” is especially relevant in flooring installation. Accurate measurements are crucial for a seamless finish and to avoid costly material waste.
Start by creating a detailed floor plan of the room, noting all corners, alcoves, and obstacles like doorways or built-in cabinets. Add an extra 5-10% to your calculations to account for cuts, waste, and potential mistakes.
When measuring for patterns or directional flooring, consider the layout carefully. Decide where you want seams to fall and how the pattern will flow from room to room. This forethought can dramatically improve the overall aesthetic of your project.
Don’t forget to account for expansion gaps around the perimeter of the room. Most flooring materials need space to expand and contract with temperature and humidity changes. Consult your flooring manufacturer’s guidelines for specific recommendations.
Acclimating Flooring Materials
Acclimation is a critical step often overlooked by eager DIYers. This process allows your flooring material to adjust to the temperature and humidity of its new environment, preventing future issues like gaps, buckling, or warping.
Bring your flooring materials into the installation room at least 48-72 hours before beginning the project. Stack the boxes in a way that allows air circulation, and maintain consistent room temperature and humidity during this period.
Different materials have varying acclimation requirements. For example, hardwood typically needs more time to acclimate than laminate or vinyl. Always refer to the manufacturer’s instructions for specific guidelines.
Remember, proper acclimation can mean the difference between a floor that lasts for decades and one that shows problems within months. Don’t skip this crucial step in your rush to complete the project.
Utilizing Proper Tools and Techniques

Having the right tools and knowing how to use them correctly can significantly impact the quality of your flooring installation. Investing in proper equipment not only makes the job easier but also ensures a more professional finish.
Essential tools may include:
A quality saw (circular or miter) for precise cuts
Spacers to maintain expansion gaps
A tapping block and pull bar for snug fits
A moisture meter to check subfloor conditions
Learn the correct installation techniques for your specific flooring type. For instance, click-lock laminate requires a different approach than glue-down vinyl tiles. Many manufacturers provide detailed installation guides or video tutorials.
Don’t hesitate to practice on a small, inconspicuous area before tackling the main room. This can help you get comfortable with the tools and techniques, reducing the risk of mistakes in more visible areas.
DIY Flooring for Home Renovation
DIY flooring can be a rewarding and cost-effective part of your home renovation. Whether you’re a beginner or an experienced DIYer, there are projects suited to every skill level. Let’s explore some options and tips to ensure your DIY flooring success.
Simple Projects for Beginners
If you’re new to DIY flooring, starting with simpler projects can help build your confidence and skills. These beginner-friendly options offer relatively easy installation while still making a significant impact on your home’s appearance.
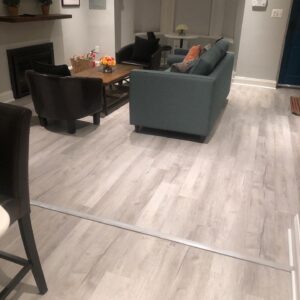
Consider peel-and-stick vinyl tiles for a quick and easy transformation. These tiles come in various designs and can be cut with a utility knife, making them perfect for small spaces like bathrooms or laundry rooms.
Another great option for beginners is click-lock laminate flooring. This system doesn’t require adhesives and can often be installed directly over existing flooring, making it a popular choice for DIY renovations.
Remember, even with simple projects, preparation is key. Ensure your subfloor is clean, level, and dry before starting. Take your time and don’t hesitate to consult online tutorials or ask for advice at your local home improvement store.
Advanced Tips for Experienced DIYers
For those with more DIY experience, tackling more complex flooring projects can yield stunning results. These advanced techniques require more skill but offer greater customization and often a higher-end finish.
Consider herringbone or other intricate patterns with hardwood or luxury vinyl planks. These designs add visual interest but require precise cutting and placement. Start by creating a detailed layout plan and use chalk lines as guides during installation.
For a truly custom look, try hand-scraping hardwood floors or creating a mixed-media floor with different materials. These projects demand creativity and skill but can result in unique, one-of-a-kind floors.
Always prioritize safety when working on advanced projects. Use proper protective equipment and ensure you’re comfortable with all tools before beginning. Don’t hesitate to call in professional help for particularly challenging aspects of the job.
Avoiding Costly DIY Mistakes
While DIY flooring can save money, mistakes can quickly erode those savings. Being aware of common pitfalls can help you avoid costly errors and ensure a successful project.
One frequent mistake is underestimating material needs. Always order 10-15% more than your measurements indicate to account for cuts, waste, and potential errors. It’s better to have a little extra than to run short mid-project.
Another costly error is rushing the job. Take your time, especially with crucial steps like subfloor preparation and acclimation. Skipping these can lead to problems that may require complete floor replacement down the line.
Don’t forget to factor in the cost of tools and additional materials like underlayment or trim. These can add up quickly and should be included in your budget from the start. Renting specialized tools for one-time use can be a cost-effective option for DIYers.
Professional Help and Resources
While DIY can be rewarding, sometimes professional assistance is necessary. Knowing when to call in experts and how to find reliable help can save you time, money, and stress in the long run.
When to Call an Expert

Recognizing when a project is beyond your DIY skills is crucial. Some situations where professional help is advisable include:
Complex subfloor issues like severe unevenness or structural problems
Installation of high-end materials like natural stone or exotic hardwoods
Large-scale projects that require specialized tools or expertise
Time-sensitive renovations where speed and efficiency are crucial
If you’re unsure about any aspect of the installation process, it’s better to consult a professional early rather than risk costly mistakes. Many flooring experts offer consultations that can provide valuable insights even if you decide to proceed with DIY.
Remember, some flooring materials have warranties that may be voided by improper DIY installation. In these cases, professional installation can protect your investment and provide peace of mind.
Finding Reputable Contractors
When seeking professional help, finding a reputable contractor is crucial. Start by asking for recommendations from friends, family, or local home improvement stores. Online review platforms can also provide insights into contractors’ reputations.
Look for contractors who:
Are licensed and insured
Have experience with your specific flooring type
Provide detailed, written estimates
Can offer references from past clients
Don’t hesitate to interview multiple contractors and compare quotes. Ask about their process, timeline, and any guarantees they offer on their work. A good contractor will be happy to answer your questions and address any concerns.
Utilizing Online Tutorials and Guides
The internet is a treasure trove of information for DIY enthusiasts. Utilizing online resources can enhance your skills and help you tackle more complex projects with confidence.
Many flooring manufacturers offer detailed installation guides and video tutorials on their websites. These resources are tailored to specific products and can provide valuable insights into best practices.
YouTube channels dedicated to home improvement can be excellent sources of visual guidance. Look for channels run by experienced professionals or those with high subscriber counts and positive feedback.
Online forums and communities for DIY enthusiasts can be great places to ask questions and get advice from experienced renovators. Remember to verify any information you receive and always prioritize manufacturer guidelines.
Maintaining Your New Floors
Proper maintenance is key to ensuring your new floors remain beautiful and functional for years to come. Let’s explore some essential practices for keeping your floors in top condition.
Regular Cleaning Practices
Establishing a consistent cleaning routine is crucial for preserving the beauty and longevity of your new floors. Different flooring materials require specific care, so always consult the manufacturer’s guidelines.
For most hard surfaces, regular sweeping or vacuuming to remove dirt and debris is essential. Use a soft-bristled broom or a vacuum with a hard floor setting to avoid scratching.
Damp mopping with a appropriate cleaner can help maintain shine and hygiene. Be cautious with water on wood floors, and always use cleaners specifically designed for your flooring type.
For carpets, regular vacuuming is key. Deep clean at least once a year, either professionally or with a rented carpet cleaner, to remove deep-set dirt and refresh the fibers.
Damage Prevention Tips
Preventing damage is often easier and more cost-effective than repairing it. Here are some tips to protect your new floors:
Use felt pads under furniture legs to prevent scratches when moving items
Place doormats at entrances to trap dirt and moisture
Avoid walking on floors with high heels or cleats
Use protective mats under rolling chairs in home offices
In areas prone to water exposure, like kitchens and bathrooms, be vigilant about wiping up spills immediately. For wood floors, maintain consistent indoor humidity levels to prevent warping or gaps.
Consider using area rugs in high-traffic zones to reduce wear. Just be sure to use rug pads that are compatible with your flooring type to avoid discoloration or damage.
Long-Term Maintenance Plans
Developing a long-term maintenance plan can help you stay proactive about floor care and address potential issues before they become major problems.
Schedule regular inspections of your floors, looking for signs of wear, damage, or changes in appearance. Early detection of issues like loose tiles or separating planks can prevent more extensive damage.
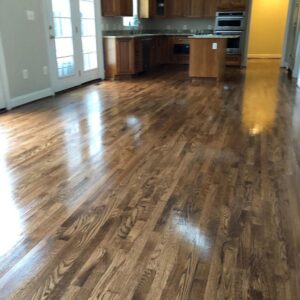
For wood floors, plan for periodic refinishing to maintain their appearance and protective seal. The frequency will depend on the type of wood and level of traffic, but every 3-5 years is common for many households.
Keep a record of your flooring type, installation date, and any treatments or repairs. This information can be valuable for future maintenance or if you decide to sell your home.
Remember, consistent care and attention to your new floors will pay off in the long run, ensuring they remain a beautiful and functional part of your home for years to come.
Contact Us
Fill out the form below and an AG Construction representative will contact you soon.
Contact Us Today


Maryland’s Premier Flooring Company
full-service flooring contractor
Whether you own a home or business, we’re your single source for complete flooring installation services! Our comprehensive services include:
- Hardwood staining, sanding, refinishing, restoration, and more!
- Carpet removal and installation
- Vinyl luxury plank replacement and installation
- Vinyl tile and COREtec installation
- And more!