back to blog

From Garage to Game Room: Durable LVP Flooring for Your Maryland Home’s Newest Space
Maryland Homeowners’ Guide to Converting Garages into Game Rooms with Stylish LVP
Converting your garage into a welcoming game room can be an exciting home improvement project, offering both style and functionality. For Maryland homeowners, selecting the right flooring is a crucial step in transforming a garage into a cozy living space, and Luxury Vinyl Plank (LVP) flooring stands out as a popular choice. Known for its durability and stylish appeal, LVP for garage conversion in Maryland can withstand the high traffic typical of game rooms. This guide will walk you through the benefits of LVP flooring, providing insights into why it’s an ideal solution for garage flooring MD homeowners should consider. Whether you’re aiming for a sleek modern look or a rustic game room vibe, LVP offers a variety of design options to suit your taste.## Planning Your Garage Conversion
Before diving into your garage conversion project, it’s crucial to plan carefully. This section will guide you through setting your vision, assessing space requirements, and budgeting for your new game room.
Setting Your Vision
Start by envisioning your ideal game room. Think about the activities you want to enjoy and the atmosphere you want to create.
Consider the types of games you’ll play, from video games to pool or ping pong. This will help you determine the layout and features you’ll need.
Remember to factor in comfort elements like seating, lighting, and sound systems. Your vision will guide all your decisions moving forward, so take time to really think it through.
Assessing Space Requirements
Measure your garage carefully to understand the space you’re working with. Account for any existing features like windows, doors, or built-in storage that you plan to keep.
Consider the height of your ceiling, especially if you’re planning to install overhead lighting or ceiling-mounted game equipment. Make sure you have enough clearance for activities like darts or pool cues.
Don’t forget to plan for storage solutions. You’ll need space to store game equipment, controllers, and other accessories when they’re not in use.
Budgeting for the Project
Create a detailed budget for your garage conversion project. Include costs for flooring, insulation, electrical work, lighting, and any necessary structural changes.
Don’t forget to factor in the cost of furniture, game equipment, and decor. These items can quickly add up, so it’s important to include them in your initial budget.
Set aside a contingency fund of about 10-15% of your total budget for unexpected expenses. This will help you avoid financial stress if you encounter any surprises during the conversion process.
Choosing the Right LVP Flooring

Selecting the appropriate LVP flooring is a critical step in your garage conversion. This section will explore the benefits of LVP, help you choose styles and colors, and consider installation factors.
Benefits of LVP for Garage Conversion Maryland
LVP flooring offers numerous advantages for garage conversion projects in Maryland. It’s highly durable, making it perfect for high-traffic areas like game rooms.
LVP is water-resistant, which is crucial in Maryland’s humid climate. This feature protects your new floor from spills and moisture issues common in converted garage spaces.
Installation of LVP is relatively simple and cost-effective compared to other flooring options. This can help keep your conversion project within budget while still achieving a stylish look.
Selecting Styles and Colors
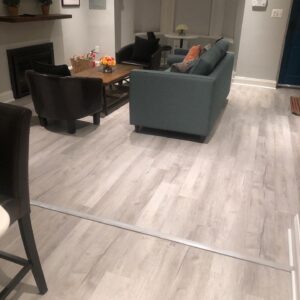
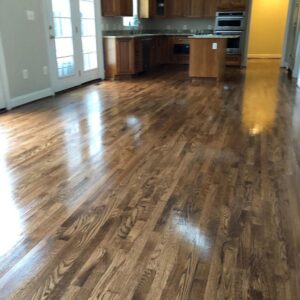
LVP comes in a wide range of styles and colors, allowing you to match any design theme. From wood-look planks to stone-inspired tiles, you’ll find options to suit your taste.
Consider the overall color scheme of your planned game room. Lighter colors can make the space feel larger, while darker tones can create a cozy, intimate atmosphere.
Don’t forget to think about maintenance when choosing colors. Lighter colors might show dirt more easily, while darker colors can hide small imperfections better.
Installation Considerations
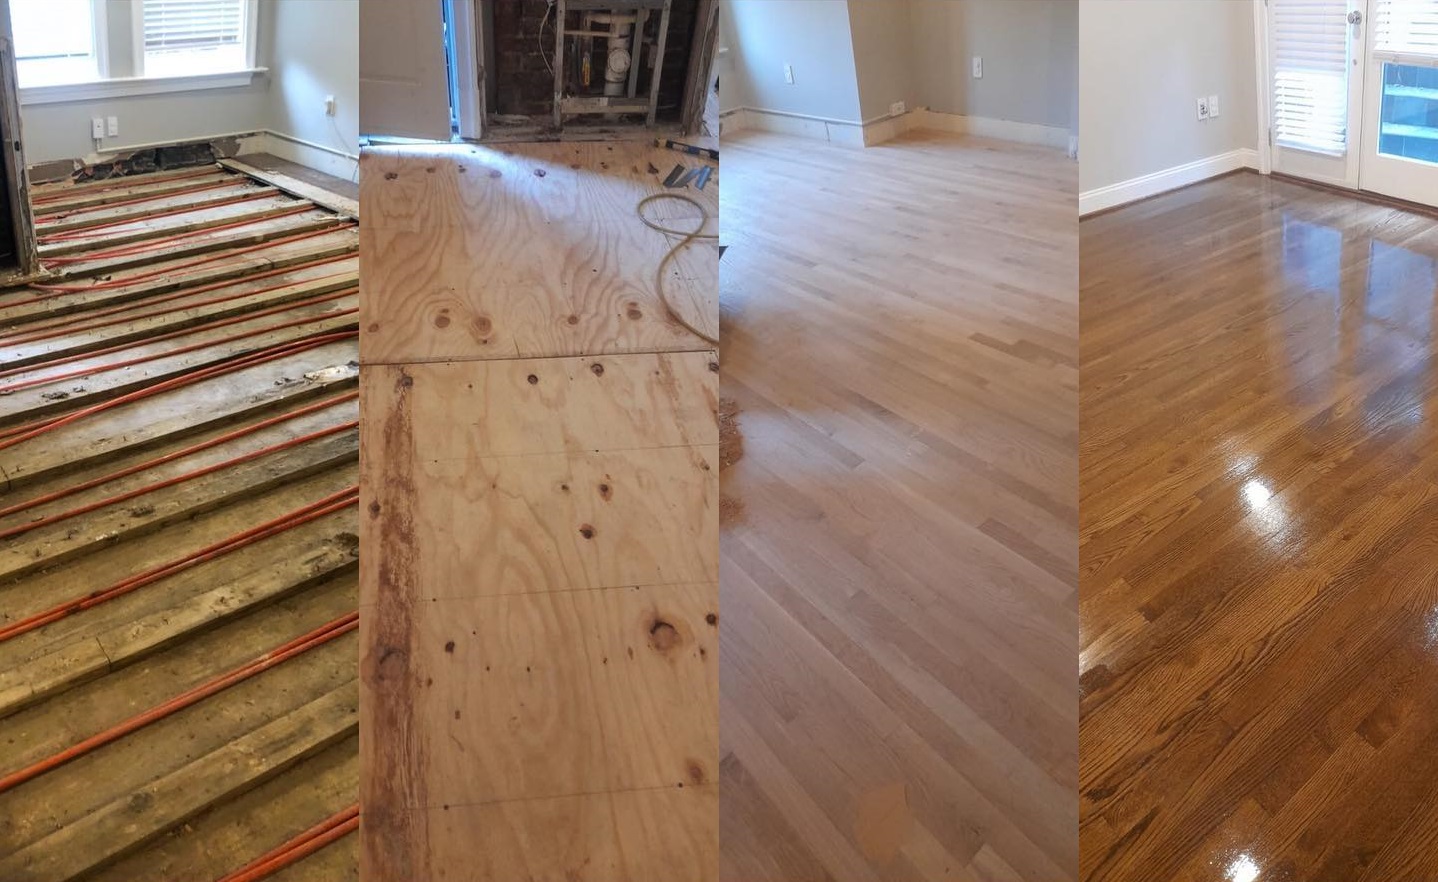
Before installation, ensure your garage floor is level and free of major cracks or damage. Any issues should be addressed to create a smooth surface for your new LVP flooring.
Consider using a moisture barrier underneath your LVP, especially in Maryland where humidity can be high. This extra layer of protection can prevent moisture-related problems in the future.
If you’re not confident in your DIY skills, hiring a professional for installation is worth considering. They can ensure proper installation, which is key to the longevity and performance of your LVP flooring.
Preparing Your Garage for Flooring

Proper preparation is key to a successful garage conversion. This section covers clearing and cleaning the space, addressing moisture issues, and ensuring proper insulation.
Clearing and Cleaning the Space
Start by removing everything from your garage. This includes stored items, shelving units, and any built-in features you don’t plan to keep.
Next, give the space a thorough cleaning. Use a degreaser to remove any oil stains from the concrete floor. These can interfere with flooring adhesion if not properly cleaned.
Finally, repair any cracks or damage in the concrete floor. Small cracks can be filled with concrete filler, while larger issues may require professional attention.
Addressing Moisture Concerns
Moisture is a common issue in garage conversions, especially in Maryland’s climate. Start by checking for any signs of water intrusion, such as damp spots or water stains.
Consider applying a concrete sealer to your garage floor. This can help prevent moisture from seeping up through the concrete and damaging your new LVP flooring.
Install a dehumidifier in your new game room to control humidity levels. This will not only protect your flooring but also create a more comfortable environment for gaming.
Ensuring Proper Insulation
Good insulation is crucial for comfort and energy efficiency in your converted garage. Start by insulating the walls and ceiling to regulate temperature and reduce noise.
Don’t forget about the garage door. If you’re keeping it, consider adding insulation to improve energy efficiency. If you’re replacing it with a wall, ensure it’s properly insulated.
Install weatherstripping around any doors or windows to prevent drafts. This will help maintain a consistent temperature in your new game room.
Creating Your Dream Game Room
With the flooring and preparation complete, it’s time to bring your game room vision to life. This section covers layout design, furniture and decor selection, and entertainment features.
Designing the Layout
Start by creating a floor plan that maximizes your space. Consider traffic flow and ensure there’s enough room for all your planned activities.
Divide the room into zones if space allows. You might have a video game area, a tabletop game section, and a lounge space for socializing.
Don’t forget to plan for storage. Built-in shelving or storage ottomans can help keep your game room organized without taking up too much floor space.
Adding Furniture and Decor
Choose comfortable, durable furniture that suits your gaming needs. Consider options like gaming chairs for video games or a sturdy table for board games.
Incorporate plenty of seating options for when friends come over. A mix of individual chairs and larger seating like sofas can accommodate different group sizes.
Add personal touches with decor that reflects your gaming interests. This could include posters, collectibles, or themed accessories that complement your LVP flooring.
Incorporating Entertainment Features
Install a high-quality sound system to enhance your gaming experience. Consider surround sound for immersive gameplay or a multi-room system for background music.
Set up proper lighting with a mix of ambient and task lighting. Dimmable lights can create the perfect atmosphere for different types of games.
Don’t forget about connectivity. Ensure you have enough electrical outlets and consider installing ethernet ports for stable online gaming.
Maintaining LVP in High Traffic Areas
To keep your new game room looking great, proper maintenance of your LVP flooring is essential. This section covers routine cleaning, damage prevention, and long-term care.
Routine Cleaning Tips
Regular sweeping or vacuuming is crucial to prevent dirt and debris from scratching your LVP flooring. Aim to do this at least a few times a week.
For deeper cleaning, use a damp mop with a cleaning solution specifically designed for LVP. Avoid using harsh chemicals or excessive water, which can damage the flooring.
Clean up spills immediately to prevent staining or water damage. LVP is water-resistant but not waterproof, so prompt attention to spills is important.
Protecting Against Damage
Use felt pads under furniture legs to prevent scratches when moving items. This is especially important for heavy game tables or frequently moved chairs.
Place mats at entrances to catch dirt and moisture before it reaches your LVP flooring. This can significantly reduce wear and tear in high-traffic areas.
Consider using area rugs in zones where spills are likely, such as around snack areas. These can protect your flooring while adding style to your game room.
Long-term Care Solutions
Periodically inspect your LVP flooring for signs of wear or damage. Address any issues promptly to prevent them from worsening.
Consider professional deep cleaning once a year to maintain the appearance and longevity of your LVP flooring. This can help remove stubborn dirt and restore shine.
Keep some spare LVP planks for potential future repairs. This ensures you can easily replace any damaged sections without worrying about color or style mismatches.
Contact Us
Fill out the form below and an AG Construction representative will contact you soon.
Contact Us Today


Maryland’s Premier Flooring Company
full-service flooring contractor
Whether you own a home or business, we’re your single source for complete flooring installation services! Our comprehensive services include:
- Hardwood staining, sanding, refinishing, restoration, and more!
- Carpet removal and installation
- Vinyl luxury plank replacement and installation
- Vinyl tile and COREtec installation
- And more!