back to blog

Why Proper Sanding is Crucial for Hardwood Floor Restoration
DIY Success: How Proper Sanding Elevates Your Hardwood Floor Restoration Projects
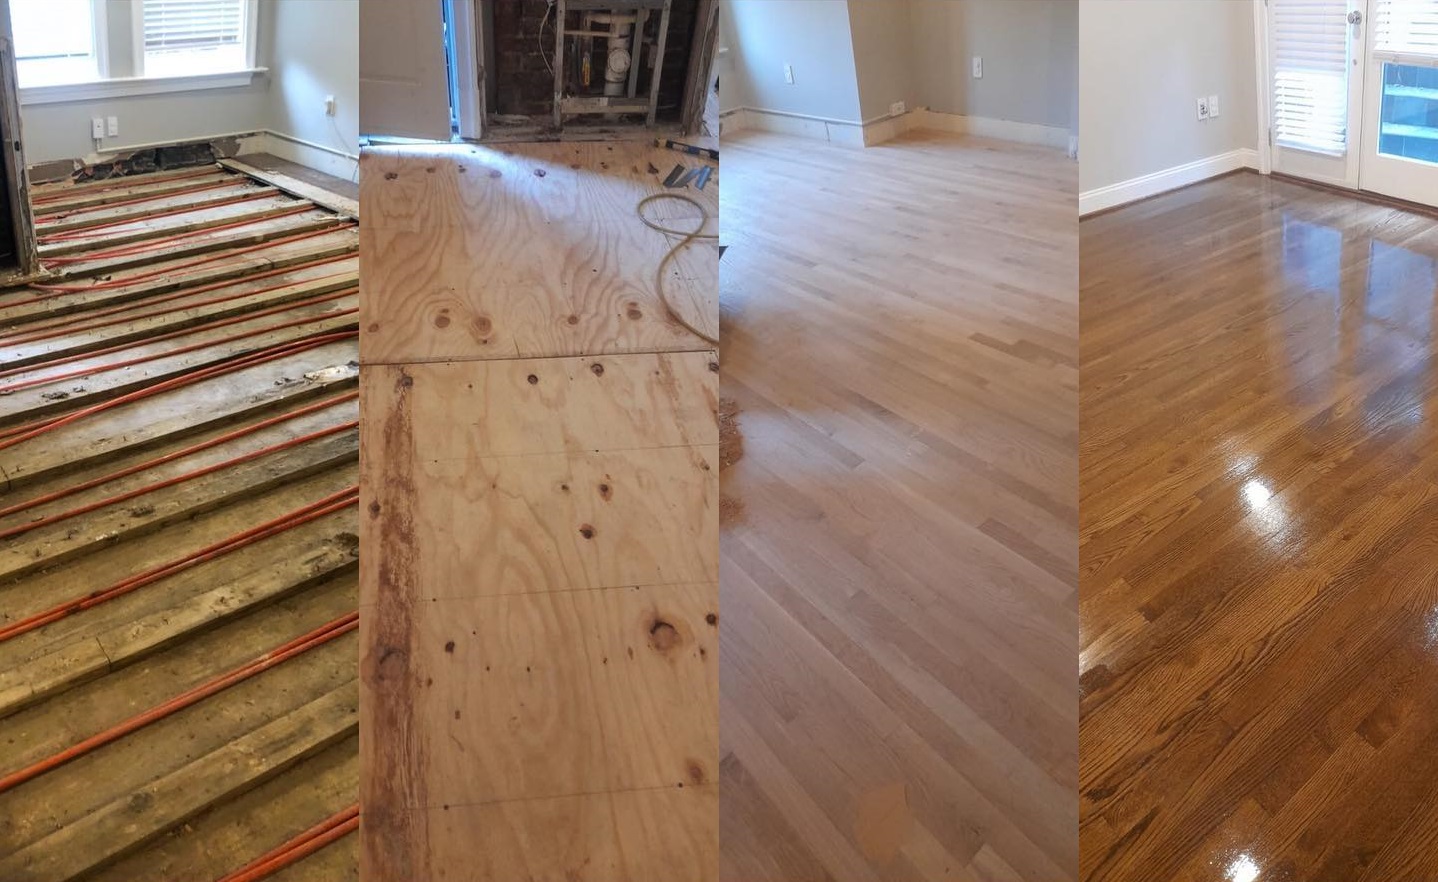
Restoring hardwood floors can transform a space, bringing warmth and elegance back into your home. The key to achieving a pristine, smooth finish lies in the often-overlooked step of proper sanding. For homeowners and DIY enthusiasts eager to tackle hardwood floor restoration, understanding the right sanding techniques is crucial for ensuring a professional-quality outcome. Whether you’re revamping a single room or managing a large property renovation, mastering this skill can save you time, money, and frustration. Join us as we delve into the essentials of sanding and discover how this foundational step can elevate your flooring projects to a new level of brilliance.
Importance of Proper Sanding

Proper sanding is the cornerstone of successful hardwood floor restoration. This crucial step sets the stage for a beautiful, long-lasting finish that can transform your space. Let’s explore why sanding matters, how to achieve a smooth finish, and common mistakes to avoid.
Why Sanding Matters
Sanding is more than just smoothing out rough spots. It’s about creating the perfect canvas for your hardwood floor’s new life.
Proper sanding removes old finishes, stains, and minor imperfections, revealing the wood’s natural beauty. This process also helps to level the floor, eliminating small height differences between boards.
By opening up the wood grain, sanding allows for better penetration of stains and sealants, ensuring a more durable and even finish. This is particularly important for protecting your hardwood floors from water damage.
Remember, skipping or rushing through the sanding process can lead to a subpar restoration, potentially costing you more in the long run.
Achieving a Smooth Finish
A smooth finish is the hallmark of a well-restored hardwood floor. It’s what gives your floor that professional, gleaming look.
To achieve this, you’ll need to progress through increasingly finer grits of sandpaper. Start with a coarse grit to remove old finishes and level the floor, then gradually move to finer grits for a polished surface.
Consistency is key. Ensure you sand the entire floor evenly, paying extra attention to high-traffic areas and spots with visible damage.
Don’t rush this process. Take your time and check your progress frequently. A smooth finish will not only look better but will also be easier to maintain in the long run.
Avoiding Common Sanding Mistakes
Even experienced DIYers can fall prey to sanding mistakes. Here are some pitfalls to watch out for:
Over-sanding: This can thin the wood too much, reducing its lifespan.
Under-sanding: Failing to remove all the old finish can lead to an uneven new finish.
Skipping grits: Jumping from coarse to fine grit too quickly can leave visible scratches.
Uneven pressure: This can create dips and valleys in your floor.
Always sand in the direction of the wood grain and keep the sander moving to avoid creating divots. If you’re unsure about your ability to sand effectively, consider consulting with flooring professionals.
Essential Sanding Techniques
Mastering the right sanding techniques is crucial for achieving professional-quality results in your hardwood floor restoration project. Let’s dive into choosing the right tools, understanding the step-by-step process, and navigating the world of sandpaper grits.
Choosing the Right Tools
Selecting the appropriate sanding tools can make or break your hardwood floor restoration project.
For large areas, a drum sander is typically the tool of choice. It’s powerful and efficient, but requires skill to operate without damaging the floor. An edge sander is essential for reaching corners and edges that the drum sander can’t access.
For smaller projects or detailed work, consider using a random orbital sander. It’s more forgiving for beginners and less likely to leave noticeable marks on the floor.
Don’t forget hand sanding tools for hard-to-reach areas and final touches. A variety of sanding blocks and pads can be invaluable for achieving that perfect finish.
Step-by-Step Sanding Process
Follow these steps for a successful sanding process:
Prepare the room: Remove all furniture and cover vents and doorways.
Inspect the floor: Look for protruding nails or deep gouges that need attention.
Start with coarse-grit sandpaper: Use 36-grit for heavily damaged floors, or 60-grit for moderately worn floors.
Sand the main area: Move the sander slowly and steadily with the grain of the wood.
Edge sanding: Use an edge sander to reach corners and along walls.
Progress through finer grits: Move to medium (80-grit) and then fine (120-grit) sandpaper.
Final pass: Use 150 or 180-grit for a smooth finish.
Clean thoroughly: Vacuum and tack the floor to remove all dust before finishing.
Remember, patience and attention to detail are key to achieving the best results.
Sandpaper Grit Guide
Understanding sandpaper grits is crucial for effective sanding. Here’s a quick guide:
Grit Range | Classification | Use Case |
|---|---|---|
24-36 | Extra Coarse | Removing old finishes, leveling uneven floors |
40-60 | Coarse | Initial sanding, removing minor imperfections |
80-100 | Medium | Smoothing after coarse sanding |
120-150 | Fine | Preparing for finishing, final smoothing |
180-220 | Very Fine | Final pass before staining or sealing |
Start with the coarsest grit necessary and work your way up. This approach ensures thorough removal of imperfections and a smooth final surface.
Preparing for Hardwood Floor Restoration
Before diving into the sanding process, proper preparation is essential. This involves evaluating your floor’s condition, preparing the space, and ensuring you’re ready to sand safely. Let’s break down these crucial steps.
Evaluating Floor Condition
A thorough assessment of your hardwood floor’s condition is the first step in any restoration project.
Start by inspecting the entire floor surface for signs of damage, such as deep scratches, gouges, or water stains. Pay special attention to high-traffic areas, which often show more wear.
Check for loose or squeaky boards that may need to be secured before sanding. If you notice any signs of wood splitting, address these issues before proceeding with sanding.
For floors with extensive damage or structural issues, it may be wise to consult a professional before proceeding with a DIY restoration.
Clearing and Cleaning the Area
Proper preparation of the work area is crucial for both the quality of your restoration and your safety.
Remove all furniture, rugs, and decorations from the room.
Seal off the area by covering doorways and vents with plastic sheeting to contain dust.
Thoroughly clean the floor, removing all dirt and debris.
Inspect for and remove any protruding nails or staples.
Remember, a clean workspace not only makes the job easier but also ensures better adhesion of finishes after sanding.
Safety Tips for Sanding
Safety should be your top priority when undertaking a hardwood floor restoration project.
Always wear appropriate personal protective equipment (PPE), including:
A dust mask or respirator
Safety goggles
Ear protection
Knee pads for comfort during detail work
Ensure proper ventilation in the work area to minimize dust inhalation. If using electrical sanders, check all cords and connections for safety.
Lastly, familiarize yourself with the operation of all tools before beginning work. If you’re unsure about any aspect of the process, don’t hesitate to seek advice from flooring professionals.
Enhancing Your Restoration Project
After the sanding process, it’s time to bring your hardwood floors back to life with proper sealing and finishing. This stage is crucial for protecting your newly restored floors and ensuring their longevity. Let’s explore the finishing techniques, maintenance tips, and when to consider professional help.
Sealing and Finishing Techniques
Sealing and finishing are critical steps that protect your freshly sanded hardwood floors and enhance their beauty.
Start by applying a wood conditioner to ensure even stain absorption if you plan to change the color of your floor. Then, choose between oil-based or water-based finishes. Oil-based finishes offer durability and a rich amber hue, while water-based options dry faster and maintain the wood’s natural color.
Apply the finish in thin, even coats using a lambswool applicator or a brush designed for floor finishing. Allow each coat to dry completely before lightly sanding and applying the next. Typically, three coats provide optimal protection.
For best results, maintain a dust-free environment during the drying process and allow the final coat to cure for at least 24 hours before walking on the floor.
Maintaining Your Hardwood Floors
Proper maintenance is key to preserving the beauty of your restored hardwood floors.
Regular cleaning is essential. Sweep or vacuum frequently to remove dirt and debris that can scratch the surface. For deeper cleaning, use products specifically designed for hardwood floors, avoiding excess water which can damage the wood.
Place mats at entryways to trap dirt and use felt pads under furniture legs to prevent scratches. Consider implementing a no-shoes policy to minimize wear and tear.
Periodically, assess your floors for signs of wear. A maintenance coat of finish every few years can help protect the wood and extend the time between major restorations.
DIY or Professional Help?
While many homeowners successfully restore their hardwood floors, sometimes professional help is the best choice.
Consider hiring a professional if:
Your floors have extensive damage or structural issues
You’re working with rare or expensive wood species
You lack the time or tools to complete the project properly
You’re uncomfortable with any aspect of the restoration process
Professionals bring expertise, specialized equipment, and often warranties for their work. They can also handle complex tasks like repairing water damage or addressing serious structural issues.
Ultimately, the decision between DIY and professional restoration depends on your skills, the condition of your floors, and your comfort level with the project.
Success Stories and Testimonials
Nothing inspires confidence like real-world success stories. Let’s explore some DIY transformations, gather expert advice, and learn how to connect with our community of flooring enthusiasts.
Real-Life DIY Transformations
DIY hardwood floor restorations can yield impressive results. Here’s a case study that showcases the potential of a well-executed project:
“I was skeptical about restoring my 100-year-old oak floors myself, but the results were beyond my expectations,” says Sarah, a homeowner from Baltimore. “With careful sanding and the right finishing techniques, I brought out a warmth and character I never knew existed in my floors.”
Key takeaways from Sarah’s project:
Patience is crucial: She spent extra time on proper sanding, progressing through grits methodically.
Research pays off: Sarah invested time in learning about wood types and finishes before starting.
Attention to detail matters: Careful cleaning between sanding stages resulted in a flawless finish.
Expert Advice from Flooring Professionals
We reached out to seasoned flooring professionals for their top tips on successful hardwood floor restoration. Here’s what they had to say:
“Never underestimate the importance of proper sanding technique,” advises John, a flooring contractor with 20 years of experience. “It’s the foundation of a great restoration.”
Lisa, a wood finishing specialist, emphasizes the importance of choosing the right products: “Quality matters. Invest in good sanders, sandpaper, and finishes. It makes a world of difference in the final result.”
“Know when to call in the pros,” suggests Mike, owner of a flooring company. “Some jobs, especially those involving structural repairs or rare woods, are best left to experienced professionals.”
Connect with Our Community
Joining a community of fellow DIY enthusiasts and professionals can provide invaluable support and inspiration for your hardwood floor restoration project.
Online Forums: Participate in discussions on platforms like Reddit’s r/HomeImprovement or specialized flooring forums.
Social Media: Follow hashtags like #HardwoodRestoration on Instagram or join Facebook groups dedicated to DIY home improvement.
Local Workshops: Check with your local hardware stores or community centers for hands-on workshops on floor restoration techniques.
Don’t forget to share your own experiences and photos once you’ve completed your project. Your success story could be the inspiration someone else needs to tackle their own restoration project!
For more expert advice and professional services, don’t hesitate to reach out to our team. We’re always here to help you achieve the beautiful hardwood floors you deserve.
Contact Us
Fill out the form below and an AG Construction representative will contact you soon.
Contact Us Today


Maryland’s Premier Flooring Company
full-service flooring contractor
Whether you own a home or business, we’re your single source for complete flooring installation services! Our comprehensive services include:
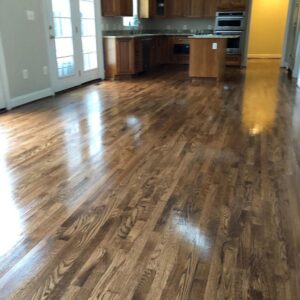
- Hardwood staining, sanding, refinishing, restoration, and more!
- Carpet removal and installation
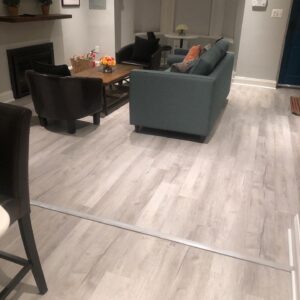
- Vinyl luxury plank replacement and installation
- Vinyl tile and COREtec installation
- And more!